Using Provider In Flutter

Software Developer | Technical Writer | Actively helping users with their questions on Stack Overflow.
In this article, we will explain what is provider, check different provider type used and give an example on how to use it in a Flutter application.
Why Use Provider?
As you may have seen in previous tutorials, I have used setState() multiple times. Now invoking setState() will notify the framework that the internal state of this object has changed, which basically means that a rebuild will happen with the updated values. The problem with setState() is that it will issue a build for the parent widget and all children widget, no matter if the children widgets are StatefulWidgets or StatelessWidgets. The other problem with setState() is that it does not help in seperation of concern which basically means seperation your code into different layers(presentation, domain, data).
To solve the above issues, there are many different state management packages one of them is provider which was created by Remi Rousselet. In simple terms, provider is a wrapper around Inherited Widgets, which was explained in the previous tutorial Using Inherited Widgets In Flutter.
For an example about provider, you can check the following application, Covid Tracker. In the Covid Tracker application I use provider for state management and MVVM architecture for the whole application.
Adding Provider To Flutter
After creating a project, navigate to the pubspec.yaml file and add the following:
dependencies:
  cupertino_icons: ^1.0.8
  flutter:
    sdk: flutter
  provider: ^6.1.2
Click CTRL + S to save, and you have successfully added provider to your Flutter application!
Example Using Provider
Let’s see an example of using InheritedWidget, using the counter application that is generated when you run flutter create new_project. First inside the main.dart we do the following:
class MyApp extends StatelessWidget {
  @override
  Widget build(BuildContext context) {
    return Provider<String>(
      create: (BuildContext context) =>  "5",
      child: MaterialApp(
        title: 'Flutter Demo',
        theme: ThemeData(
          primarySwatch: Colors.blue,
        ),
        home: MyHomePage(title: 'Flutter Provider Tutorial'),
      ),
    );
  }
}
So here we define the Provider at the top of the widget tree, and we create an object of type String. Since, it is defined at the top of the widget tree, then all the child widgets will be able to access the value 5. Then create a home_screen.dart file that will contain the following code:
import 'package:flutter/material.dart';
import 'package:provider/provider.dart';
class MyHomePage extends StatelessWidget {
MyHomePage({Key? key, this.title}) : super(key: key);
final String? title;
@override
Widget build(BuildContext context) {
String result = Provider.of<String>(context);
return Scaffold(
appBar: AppBar(
title: Text(this.title!),
),
body: Center(
child: Column(
mainAxisAlignment: MainAxisAlignment.center,
children: <Widget>[
Text(
'You have pushed the button this many times:',
),
Text(
'$result',
style: Theme.of(context).textTheme.headlineMedium,
)
,
],
),
),
floatingActionButton: FloatingActionButton(
onPressed: (){},
tooltip: 'Increment',
child: Icon(Icons.add),
),
);
}
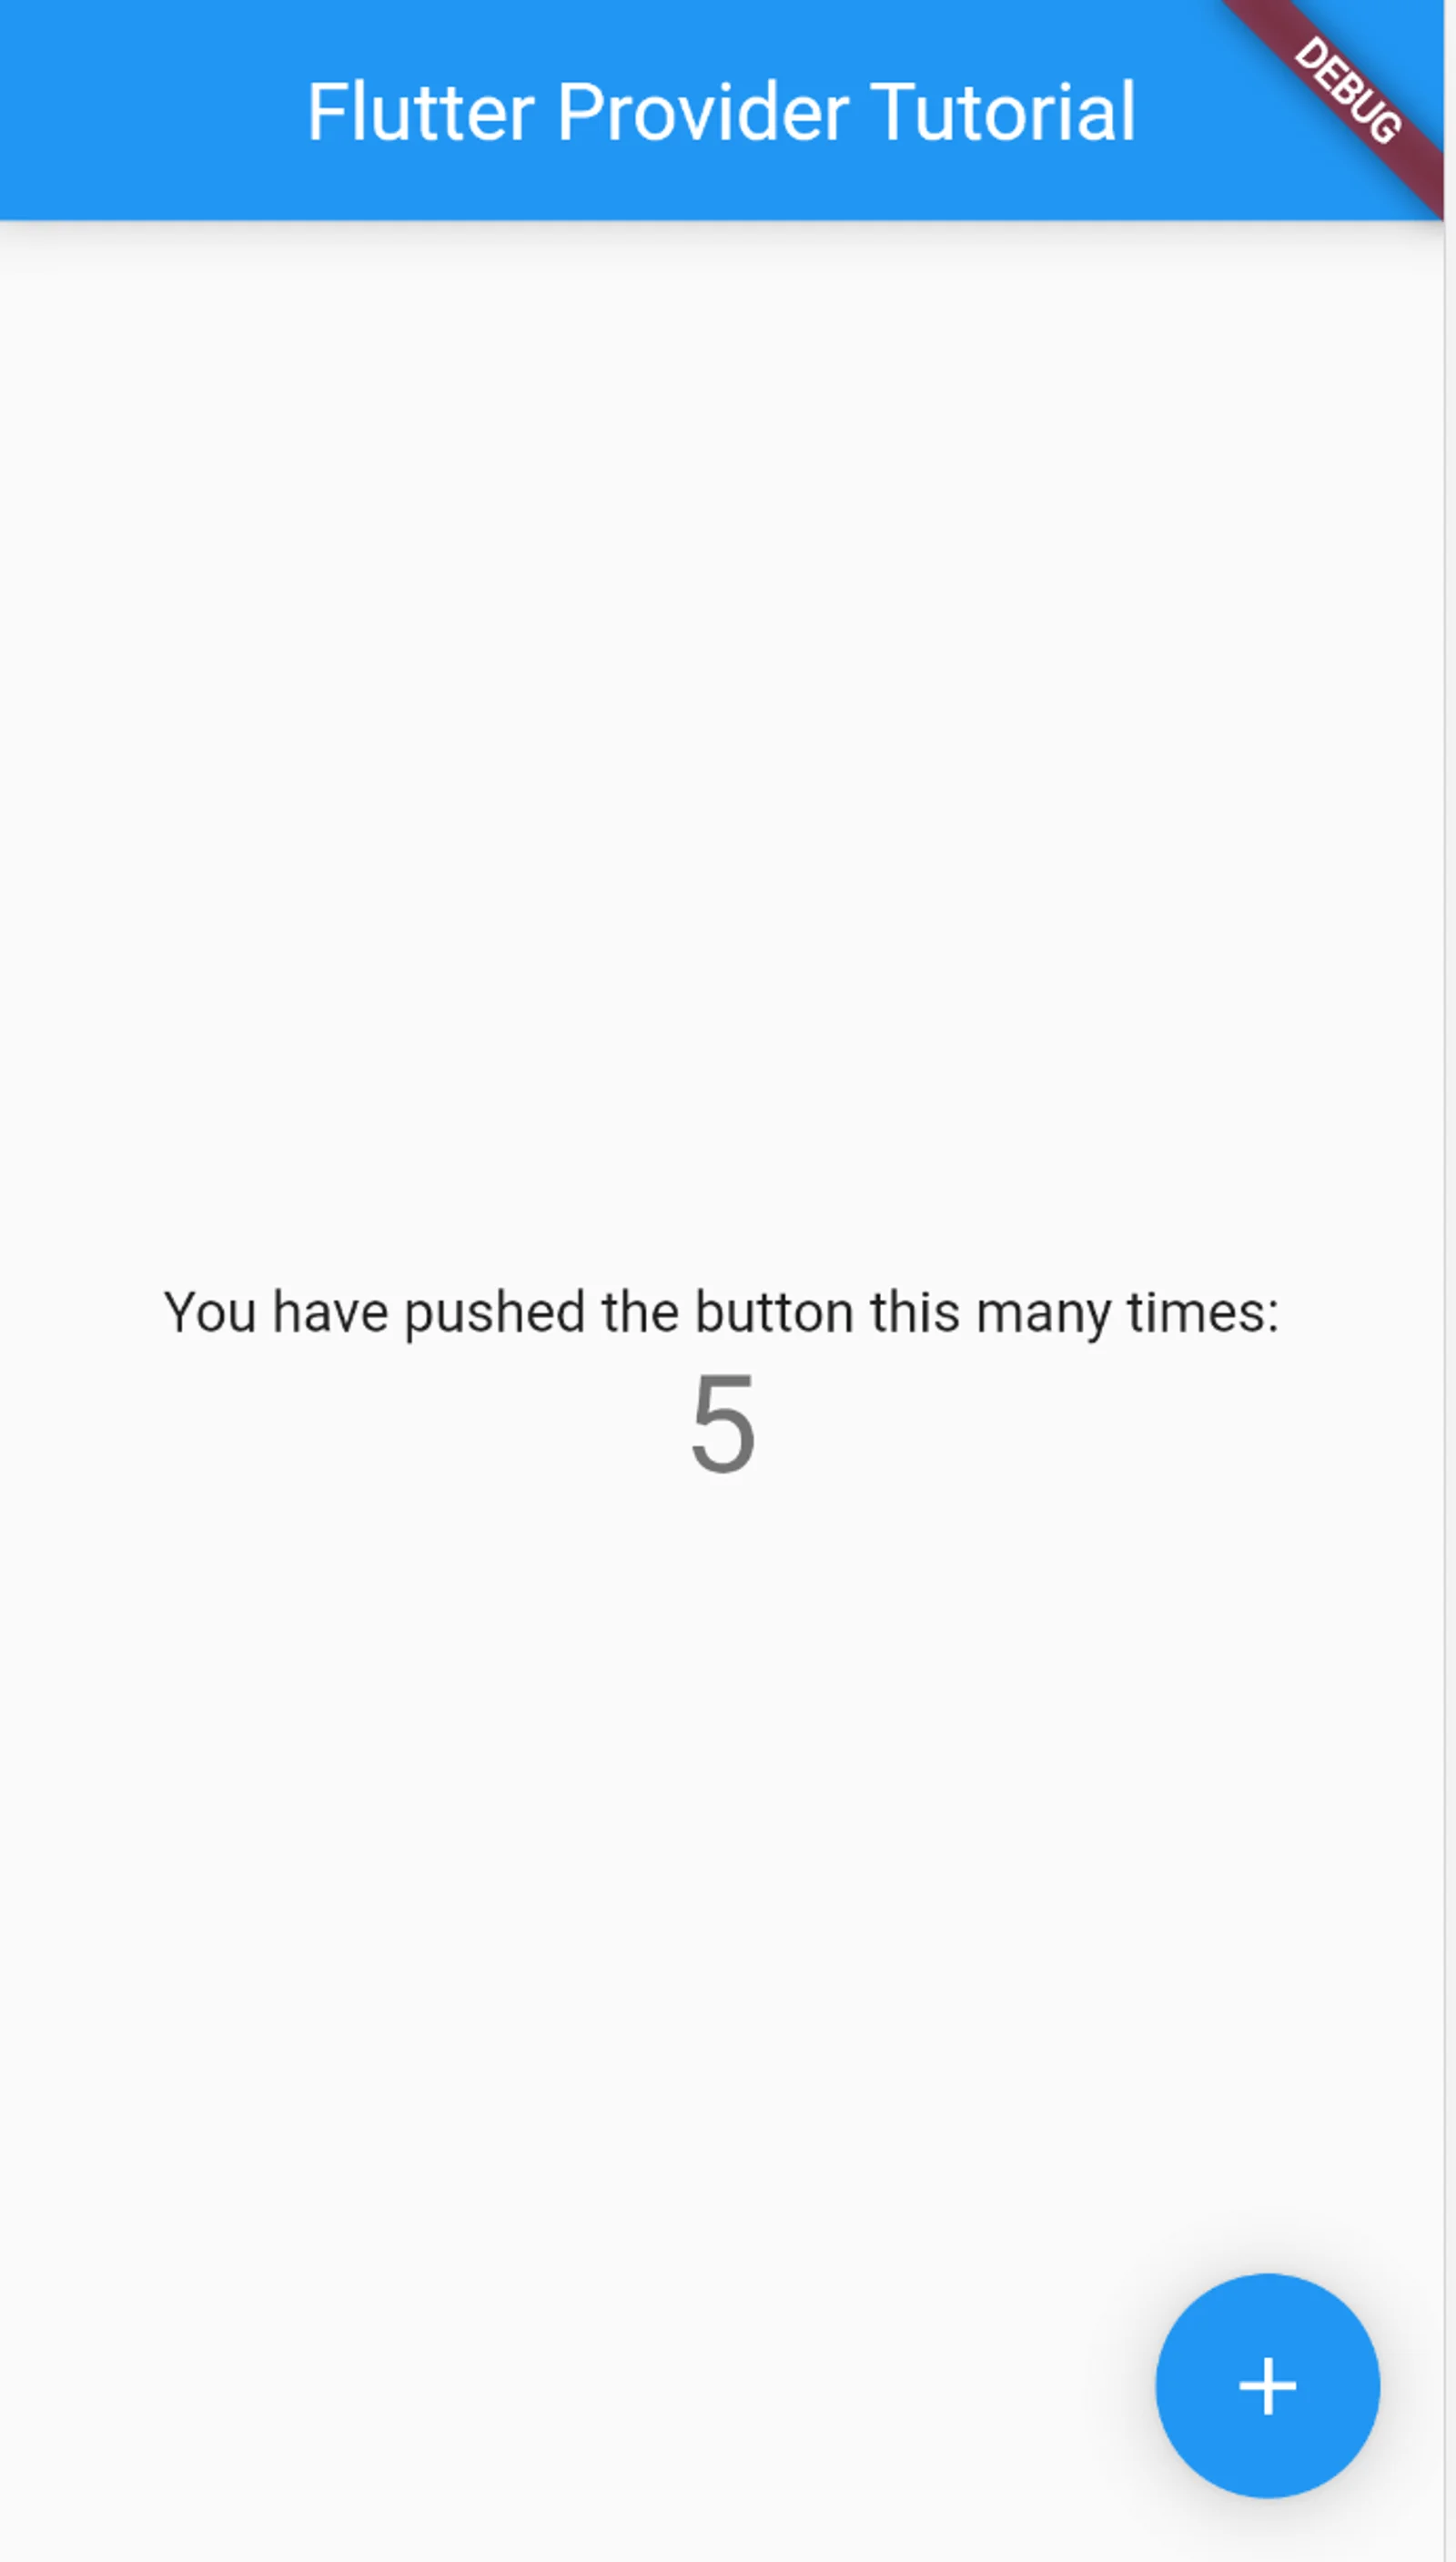
}which will give us the following screen:
So, first to get the String value created in the main.dart, all we have to do is call Provider.of<String>(context), the of() method here will obtain the nearest Provider up its widget tree and returns its value. Also in the code above, we are reading the value, in this case there is no way to update unless we update the value in the code.
The declaration of the of() method is the following:
T of<T>(BuildContext context, {bool listen = true})which means it has an optional named paramter listen with default value true. If listen is true, and the value of this provider is updated then it will trigger a rebuild, while if listen is false then it won’t rebuild the widget.
Update State Using Provider
In the previous section, we saw how to read from provider. In this section, we will update the counter value on each click. To be able to achieve that, we will use a particular type of Provider called ChangeNotifierProvider. The ChangeNotifierProvider, creates a ChangeNotifier using the create property and automatically dispose it when it is removed from the widget tree.
ChangeNotifer is a class under the Flutter SDK that provides a change notification API. So basically ChangeNotifier contains a method called notifyListener(), whenever it is called it will then notify all the clients registered to it that the object has changed. Let’s see in the example below:
import 'package:flutter/material.dart';

class CounterViewModel extends ChangeNotifier {

  int _counter = 0;

  int get counter => _counter;

    void incrementCounter() {
      _counter++;
      notifyListeners();
  }
}
So, here we create a class called CounterViewModel which will extend the ChangeNotifier class to be able to use the notifyListener() method, or we can use it as a mixin class CounterViewModel with ChangeNotifier { in both cases we have access to the notifyListener() method. We use the incrementCounter method to add +1 to the _counter variable. When the _counter changes, the class will notify its listener using notifyListeners(). Now, navigate to the main.dart file and add the following:
class MyApp extends StatelessWidget {
  @override
  Widget build(BuildContext context) {
    return ChangeNotifierProvider<CounterViewModel>(
      create: (BuildContext context) =>  CounterViewModel(),
      child: MaterialApp(
        title: 'Flutter Demo',
        theme: ThemeData(
          primarySwatch: Colors.blue,
        ),
        home: MyHomePage(title: 'Flutter Provider Tutorial'),
      ),
    );
  }
}
So here, instead of using the Provider widget, we use ChangeNotifierProvider which will listen to changes in the CounterViewModel and update the UI. Then inside the home_screen.dart, we do the following:
class MyHomePage extends StatelessWidget {
  MyHomePage({Key? key, this.title}) : super(key: key);

  final String? title;

  @override
  Widget build(BuildContext context) {
    return Scaffold(
      appBar: AppBar(
        title: Text(this.title!),
      ),
      body: Center(
        child: Column(
          mainAxisAlignment: MainAxisAlignment.center,
          children: <Widget>[
            Text(
              'You have pushed the button this many times:',
            ),
            Consumer<CounterViewModel>(builder: (context, viewModel, child) {
              return Text(
                '${viewModel.counter}',
                style: Theme.of(context).textTheme.headline4,
              );
            }),
          ],
        ),
      ),
      floatingActionButton: FloatingActionButton(
        onPressed: Provider.of<CounterViewModel>(context,listen: false).incrementCounter,
        tooltip: 'Increment',
        child: Icon(Icons.add),
      ),
    );
  }
}
To access the counter getter of the class CounterViewModel, we need to use a Consumer widget.
The Consumer widget has a builder function that is called whenever the ChangeNotifierProvider gets notified of any changes in the object. The builder function has 3 parameters. First parameter is, context which is the BuildContext of this builder, then viewModel which will give you access to the properties and methods inside the class CounterViewModel, and the optional child parameter which you can use to avoid rebuild.
Also, as you can see we use Provider.of<CounterViewModel>(context,listen: false).incrementCounter with listen:false, if listen is true then the whole build() method would get called.
References
Couple of articles/tutorials that I read and recommend reading:
I hope you enjoyed reading this flutter tutorial, please feel free to leave any comments or feedback on this post!