Using Firebase Authentication in Flutter

Software Developer | Technical Writer | Actively helping users with their questions on Stack Overflow.

In this article, we will create a form to be able to create a new user which will be authenticated using the firebase authentication and also will be connected to the firebase realtime database.
Get Started With Firebase Auth In Flutter
This is the third article related to Firebase in Flutter, you can check the other articles in the below links:
- Get Started With Firebase in Flutter
- Using Firebase Queries In Flutter
- Using Cloud Firestore In Flutter
- Using Firebase Storage In Flutter
- Using Google Sign-in With Firebase In Flutter
- Using Twitter Authentication With Firebase In Flutter
- Using Facebook Authentication With Firebase In Flutter
Enabling Firebase Authentication
First to be able to use the email/password firebase authentication method in the application, you need to enable it in the firebase console. Therefore, login to the firebase console then choose the Authentication menu and click on the sign-in method. Check the following image for more information how will it be after enabling it.

So, after enabling it, you can now use firebase authentication in your project!
Adding the Firebase Auth To Flutter
To start using the firebase authentication inside the application, then you need to add the plugin to the pubspec.yaml:
dependencies:
  cupertino_icons: ^1.0.8
  firebase_auth: ^5.1.4
  firebase_core: ^3.3.0
  firebase_database: ^11.0.4
  flutter:
    sdk: flutter
  flutter_signin_button: ^2.0.0
  splashscreen:
    git:
      url: https://github.com/DPLYR-dev/SplashScreenFlutterPackage.git
      ref: master

dev_dependencies:
  flutter_test:
    sdk: flutter
For the purpose of this tutorial, the above dependencies were added. The firebase_database will enable you to add the authenticated users to the database. The splashscreen creates a splash screen in the application and the flutter_sigin_button contains customized sign in buttons.
Creating A Splash Screen
First to easily create a splash screen, you can use the dependency splashscreen and just use it in the code. Inside the main.dart, create a statelesswidget:
void main() async {
  WidgetsFlutterBinding.ensureInitialized();
  await Firebase.initializeApp(options: DefaultFirebaseOptions.currentPlatform);
  runApp(MyApp());
}

class MyApp extends StatelessWidget {
  @override
  Widget build(BuildContext context) {
    return MaterialApp(
      debugShowCheckedModeBanner: false,
      title: 'Meet Up',
      theme: ThemeData(
        primarySwatch: Colors.blue,
      ),
      home: IntroScreen(),
    );
  }
}
Now let’s create the IntroScreen() widget:
class IntroScreen extends StatelessWidget {
  @override
  Widget build(BuildContext context) {
    User result = FirebaseAuth.instance.currentUser;
    return new SplashScreen(
        navigateAfterSeconds: result != null ? Home(uid: result.uid) : SignUp(),
        seconds: 5,
        title: new Text(
          'Welcome To Meet up!',
          style: new TextStyle(fontWeight: FontWeight.bold, fontSize: 20.0),
        ),
        image: Image.asset('assets/images/dart.png', fit: BoxFit.scaleDown),
        backgroundColor: Colors.white,
        styleTextUnderTheLoader: new TextStyle(),
        photoSize: 100.0,
        onClick: () => print("flutter"),
        loaderColor: Colors.red);
  }
}
As, you can see the SplashScreen class will create a splash screen for you. Since, we are using Image.asset, then you need to add an image inside the pubspec.yaml file so it can appear in the splash screen.
Inside the build() method we get the currently logged in user by calling the property currentUser which returns the user of type User. Inside the SplashScreen() widget we use the navigateAfterSeconds property which either takes a widget as a value or string if you are using named route. So here we use the ternary operator to check if result is not null then navigate to the Home Screen else navigate to the SignUp Screen.
Creating Different Sign Up Buttons
In the SignUp page, we can create different buttons to sign up. For example, we can create a button to sign up using Google Sign in or using Twitter:
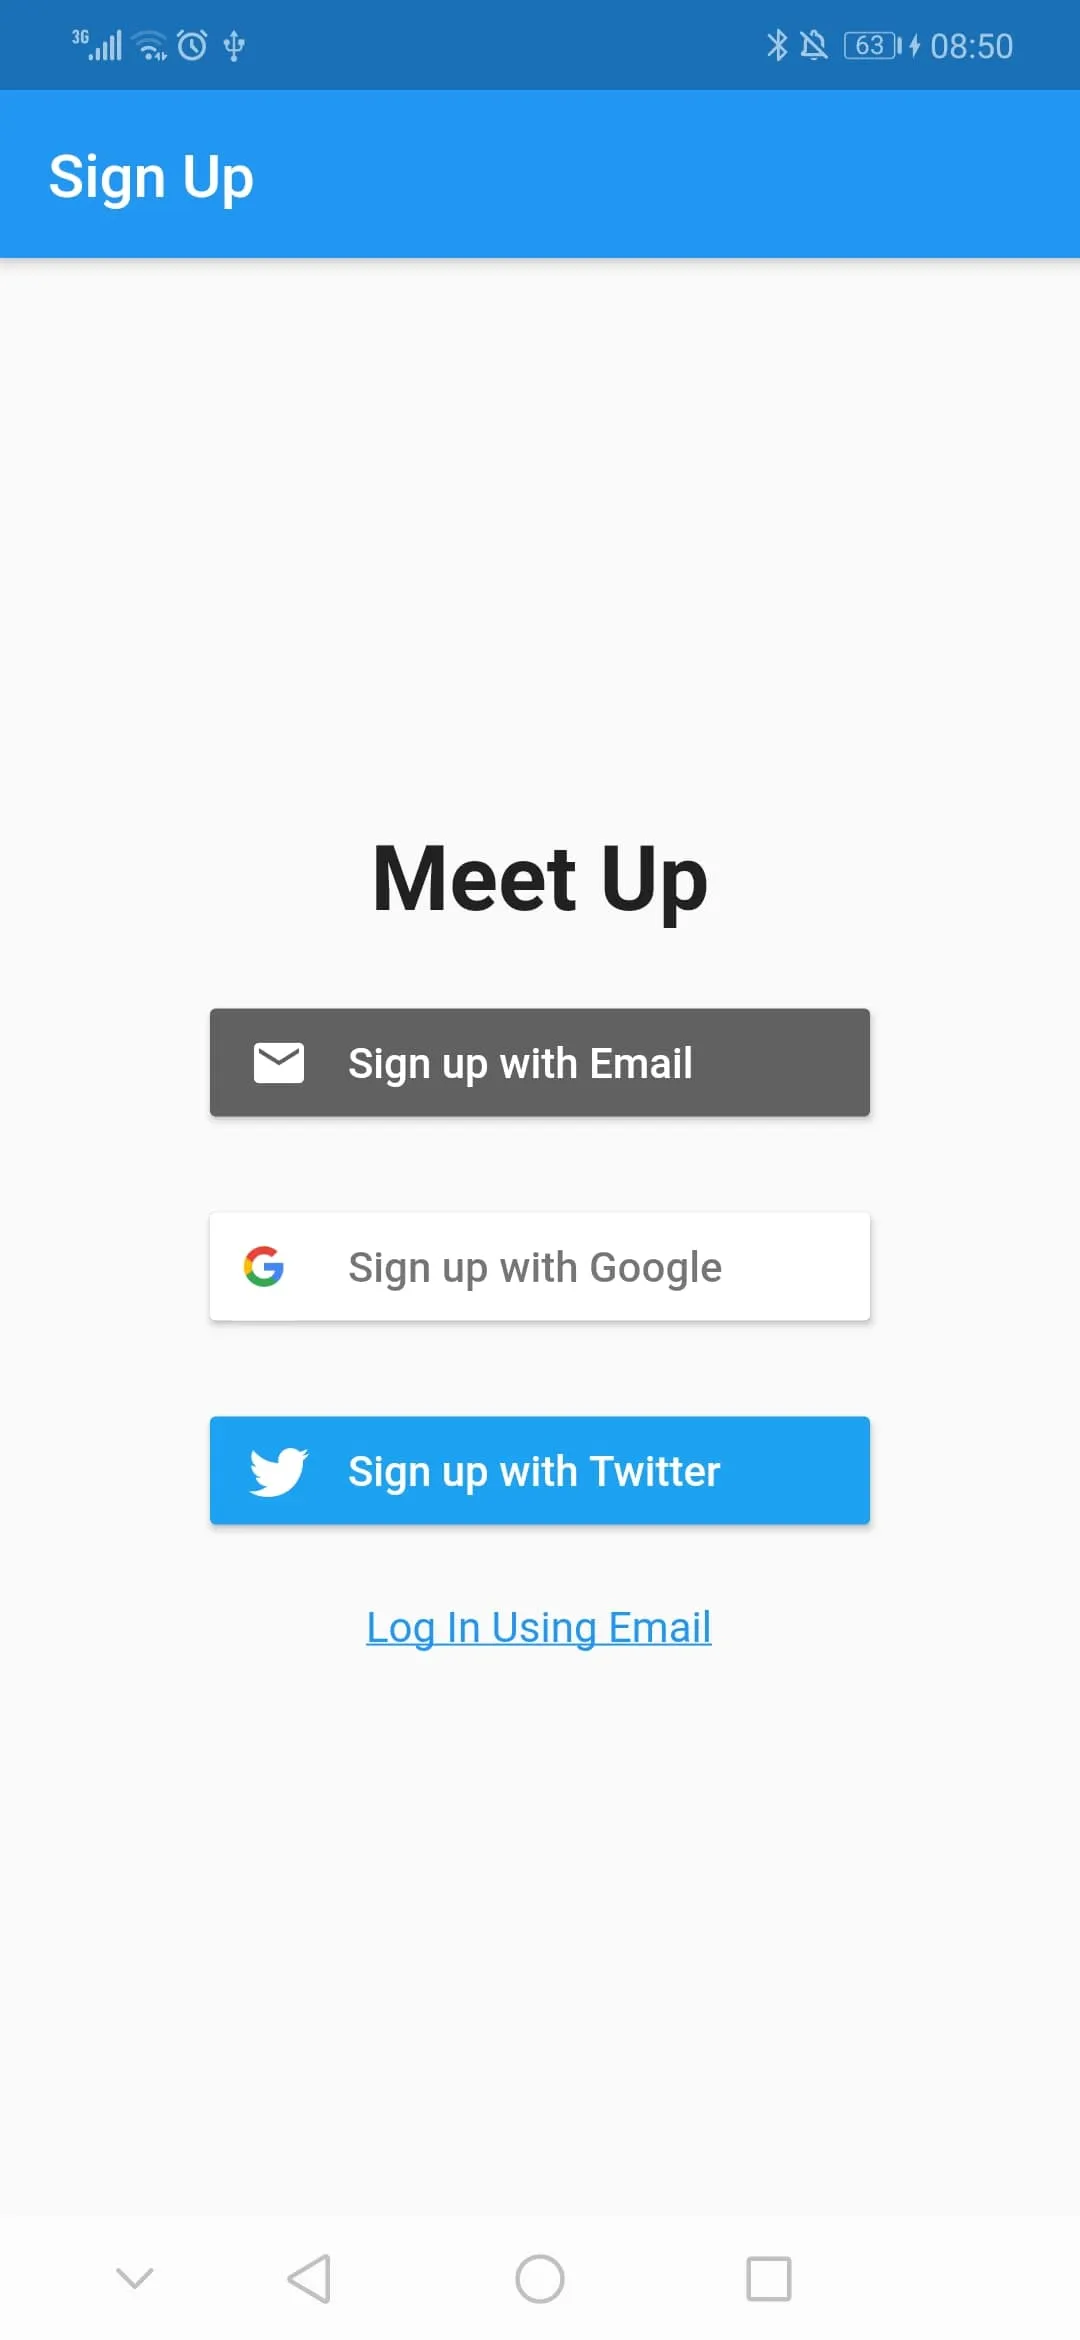
To create the above interface you need to do the following:
    return Scaffold(
        appBar: AppBar(
          title: Text(widget.title),
        ),
        body: Center(
          child: Column(mainAxisAlignment: MainAxisAlignment.center, children: <
              Widget>[
            Padding(
              padding: EdgeInsets.all(10.0),
              child: Text("Meet Up",
                  style: TextStyle(
                      fontWeight: FontWeight.bold,
                      fontSize: 30,
                      fontFamily: 'Roboto')),
            ),
            Padding(
                padding: EdgeInsets.all(10.0),
                child: SignInButton(
                  Buttons.Email,
                  text: "Sign up with Email",
                  onPressed: () {
                    Navigator.push(
                      context,
                      MaterialPageRoute(builder: (context) => EmailSignUp()),
                    );
                  },
                )),
            Padding(
                padding: EdgeInsets.all(10.0),
                child: SignInButton(
                  Buttons.Google,
                  text: "Sign up with Google",
                  onPressed: () {},
                )),
            Padding(
                padding: EdgeInsets.all(10.0),
                child: SignInButton(
                  Buttons.Twitter,
                  text: "Sign up with Twitter",
                  onPressed: () {},
                )),
            Padding(
                padding: EdgeInsets.all(10.0),
                child: GestureDetector(
                    child: Text("Log In Using Email",
                        style: TextStyle(
                            decoration: TextDecoration.underline,
                            color: Colors.blue)),
                    onTap: () {
                      Navigator.push(
                        context,
                        MaterialPageRoute(builder: (context) => EmailLogIn()),
                      );
                    }))
          ]),
        ))
So we use a Column widget and the children property, and inside we use the class SignInButton which will create different custom sign in buttons that are from the dependency flutter_signin_button.
In this tutorial, we will only use the email method. The Log in Using Email will navigate to the EmailLogIn page while the Sign up with Email will navigate to the SignUp page.
Creating The Email Sign Up Form
Inside this page, we need to create a form that will navigate to the Home page when clicking submit and will add the data to both the firebase database and the firebase authentication console. So, first under the created State class we need to declare the following variables:
  final _formKey = GlobalKey<FormState>();
  FirebaseAuth firebaseAuth = FirebaseAuth.instance;
  DatabaseReference dbRef = FirebaseDatabase.instance.ref().child("Users");
  TextEditingController emailController = TextEditingController();
  TextEditingController nameController = TextEditingController();
  TextEditingController passwordController = TextEditingController();
  TextEditingController ageController = TextEditingController();
The GlobalKey is used to identify this form, we also create a reference to the child Users and we create the TextEditingController that will be attached to the textformfield.
Then inside the build method we create the Form:
    return Form(
        key: _formKey,
        child: SingleChildScrollView(
            child: Column(children: <Widget>[
          Padding(
            padding: EdgeInsets.all(20.0),
            child: TextFormField(
              controller: nameController,
              decoration: InputDecoration(
                labelText: "Enter User Name",
                enabledBorder: OutlineInputBorder(
                  borderRadius: BorderRadius.circular(10.0),
                ),
              ),
              // The validator receives the text that the user has entered.
              validator: (value) {
                if (value.isEmpty) {
                  return 'Enter User Name';
                }
                return null;
              },
            ),
          ),
We create four textformfields and each field will contain its own validation. After that we create a ElevatedButton widget that will be the submit button:
child: ElevatedButton(
    style: ButtonStyle(backgroundColor: WidgetStateProperty.all<Color>(Colors.lightBlue)),
    onPressed: () {
    if (_formKey.currentState.validate()) {
        registerToFb();
    }
    },
    child: Text('Submit'),
),
The method validate() will check if all the fields are validated, then inside the method registerToFb() we add the data to firebase database and firebase authentication. This is the most important part:
  void registerToFb() {
    firebaseAuth
        .createUserWithEmailAndPassword(
            email: emailController.text, password: passwordController.text)
        .then((result) {
      dbRef.child(result.user.uid).set({
        "email": emailController.text,
        "age": ageController.text,
        "name": nameController.text
      }).then((res) {
        Navigator.pushReplacement(
          context,
          MaterialPageRoute(builder: (context) => Home(uid: result.user.uid)),
        );
      });
    }).catchError((err) {
      showDialog(
          context: context,
          builder: (BuildContext context) {
            return AlertDialog(
              title: Text("Error"),
              content: Text(err.message),
              actions: [
                TextButton(
                  child: Text("Ok"),
                  onPressed: () {
                    Navigator.of(context).pop();
                  },
                )
              ],
            );
          });
    });
  }
So, first we call the method createUserWithEmailAndPassword that will create the user inside the firebase authentication, we also pass the email and the password to this method. To access both the value of the email and the password we need to use the property text on the TextEditingController. Since the createUserWithEmailAndPassword returns a Future<AuthResult>, then we will use the method then() that will take a callback which will contain a variable of type AuthResult, and since the class AuthResult contains the variable user of type FirebaseUser then we can retreive the uid by doing result.user.uid.
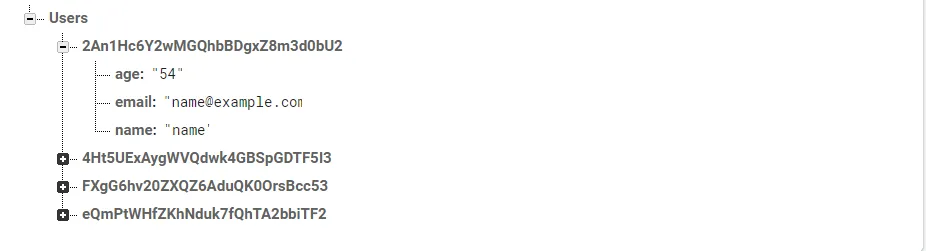
After that we use the method set() to add the data to the firebase realtime database. The reason we add the data to the database because on the sign up page that user may add additional data othe than the email and the password, which cannot be added to the firebase authentication. Therefore we add both the age and the name to the database.
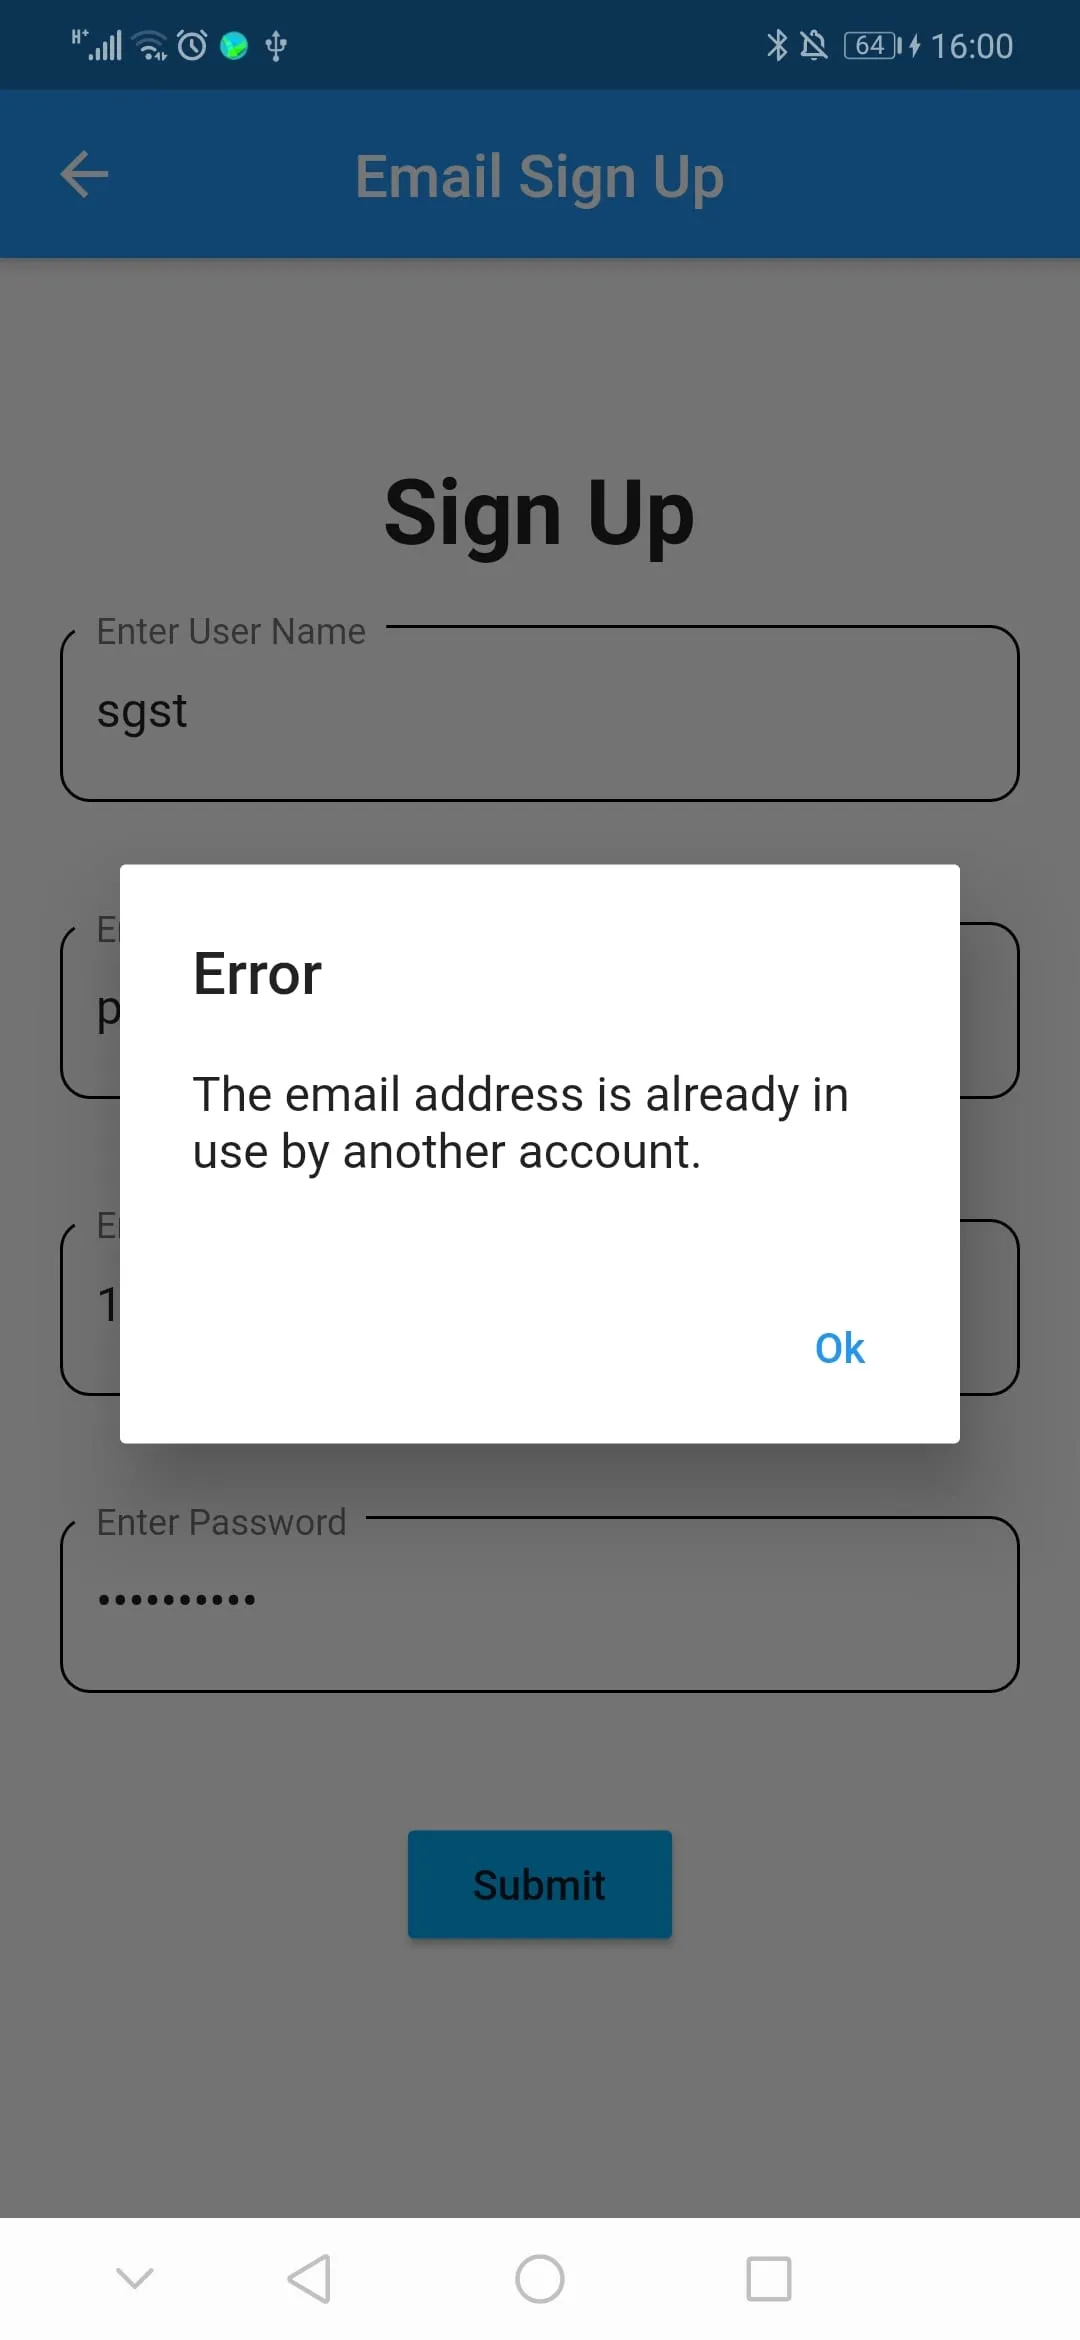
After successfully adding the data, we navigate to the Home page and send the uid as an argument. The second important part is the catchError, which is used to catch any error for asynchronous method and since you want the user to know why it was unsuccessful, then you need to use the function showDialog that will show a dialog with the error that occured:
Don’t forget to dispose the texteditingcontroller:
  @override
  void dispose() {
    super.dispose();
    nameController.dispose();
    emailController.dispose();
    passwordController.dispose();
    ageController.dispose();
  }
Creating a Drawer
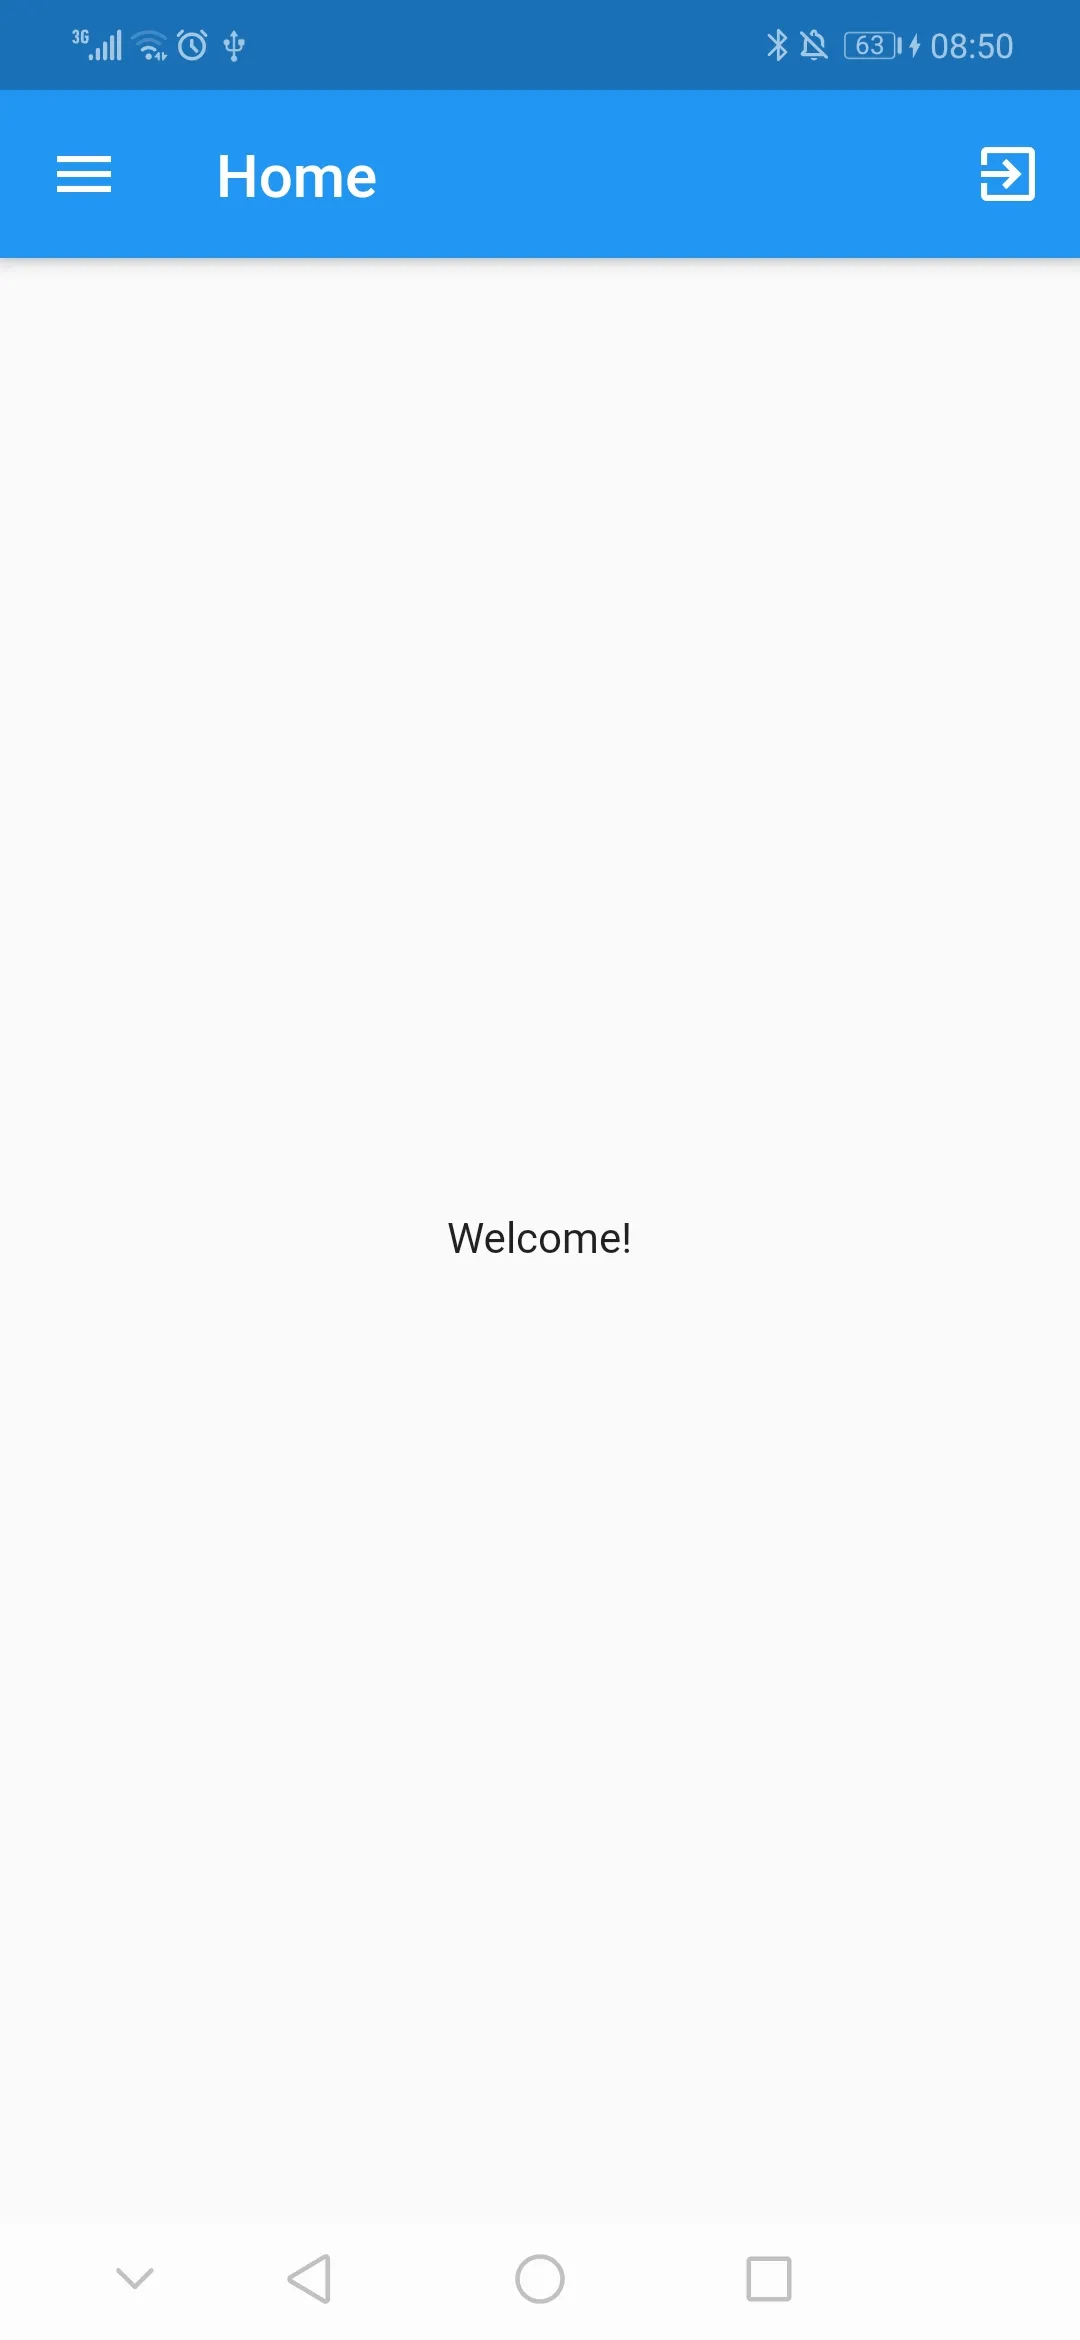
So first inside the Home page, we create a Statelesswidget and inside the build method we do the following:
return Scaffold(
appBar: AppBar(
    title: Text(title),
    actions: <Widget>[
    IconButton(
        icon: Icon(
        Icons.exit_to_app,
        color: Colors.white,
        ),
        onPressed: () {
        FirebaseAuth auth = FirebaseAuth.instance;
        auth.signOut().then((res) {
            Navigator.pushAndRemoveUntil(
                context,
               MaterialPageRoute(builder: (context) => SignUp()),
              (Route<dynamic> route) => false);
           });
        },
    )
    ],
),
body: Center(child: Text('Welcome!')),
drawer: NavigateDrawer(uid: this.uid));
We add an icon on the appBar that will be used to sign out the user. So, we use the method signOut that returns a Future, after the Future is finished we navigate to the SignUp page, which is the first page after the splash screen.
The Scaffold widget contains a property called drawer which takes a widget as a value. Therefore you can create a class that extends a statelesswidget which will act as the drawer in the application.
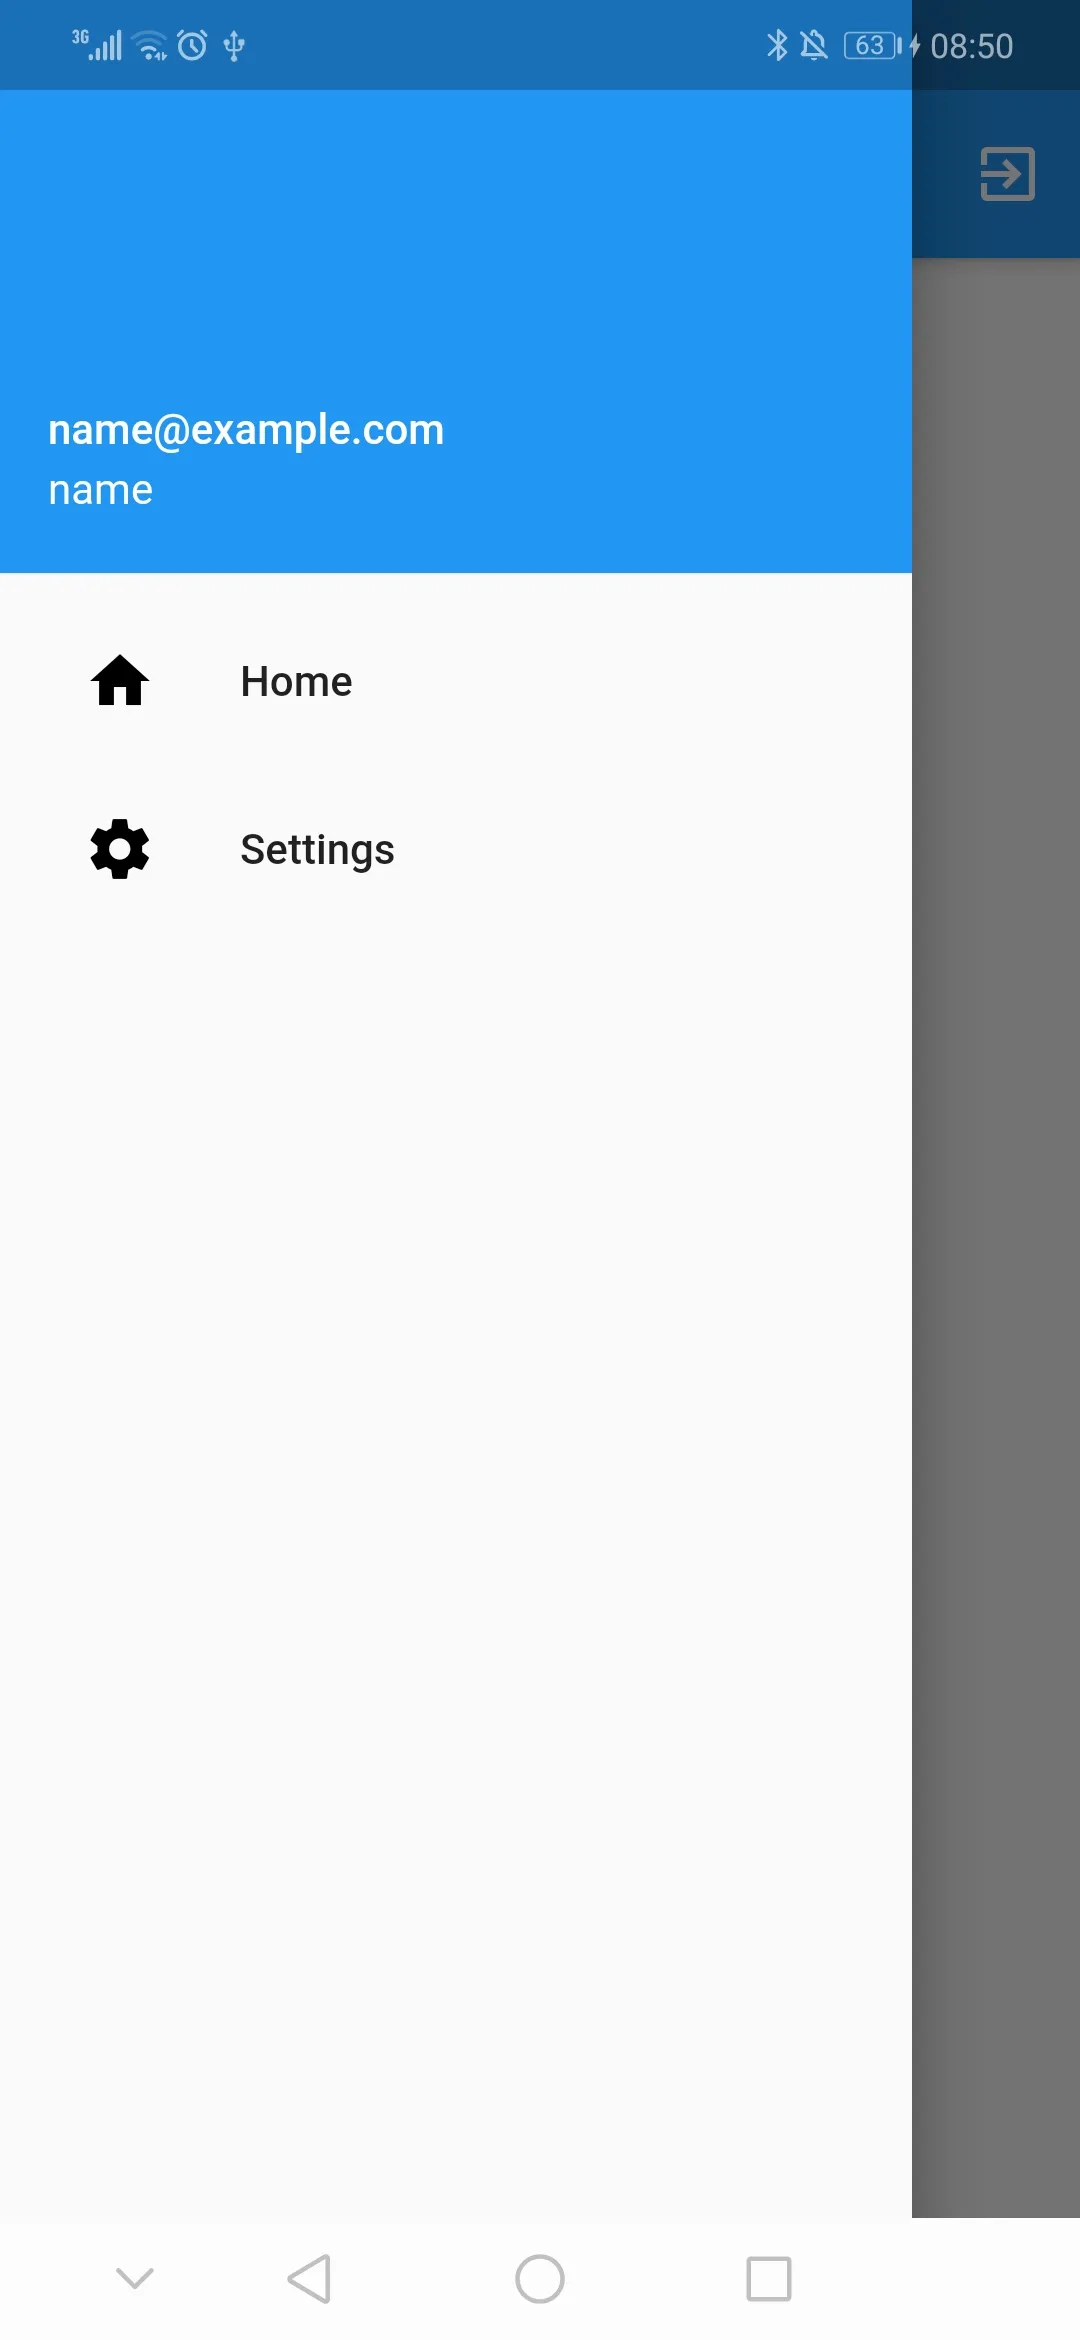
Then inside the build method of the class _NavigateDrawerState (Since NavigationDrawer is a statefulwidget), we use a FutureBuilder to retrieve the name and age of the user and add it in the header of the drawer. Therefore inside the FutureBuilder, we create the drawer:
return Drawer(
child: ListView(
    padding: EdgeInsets.zero,
    children: <Widget>[
          UserAccountsDrawerHeader(
            accountEmail: FutureBuilder(
                future: FirebaseDatabase.instance
                    .ref()
                    .child("Users")
                    .child(widget.uid!)
                    .once(),
                builder: (context, AsyncSnapshot<DatabaseEvent> snapshot) {
                  if (snapshot.hasData) {
                    Map<String, dynamic> data =
                        Map<String, dynamic>.from(snapshot.data!.snapshot.value as Map);
                    return Text(data['email'] as String);
                  } else {
                    return CircularProgressIndicator();
                  }
                }),
            accountName: FutureBuilder(
                future: FirebaseDatabase.instance
                    .ref()
                    .child("Users")
                    .child(widget.uid!)
                    .once(),
                builder: (context, AsyncSnapshot<DatabaseEvent> snapshot) {
                  if (snapshot.hasData) {
                    Map<String, dynamic> data =
                        Map<String, dynamic>.from(snapshot.data!.snapshot.value as Map);
                    return Text(data['name'] as String);
                  } else {
                    return CircularProgressIndicator();
                  }
                }),
            decoration: BoxDecoration(
              color: Colors.blue,
            ),
          ),
      ListTile(
          leading: new IconButton(
          icon: new Icon(Icons.home, color: Colors.black),
          onPressed: () => null,
          ),
          title: Text('Home'),
          onTap: () {
          print(widget.uid);
          Navigator.push(
              context,
              MaterialPageRoute(
                  builder: (context) => Home(uid: widget.uid)),
          );
          },
      ),
      ListTile(
        leading: new IconButton(
          icon: new Icon(Icons.settings, color: Colors.black),
          onPressed: () => null,
        ),
        title: Text('Settings'),
        onTap: () {
          print(widget.uid);
        },
      ),
    ],
),
);
Inside the Drawer, we use a ListView and the children property. First we add the UserAccountsDrawerHeader which is a material design Drawer header that identifies the app’s user, which will contain the name and the age retrieved from the database. Then we use a ListTile which will be an item inside the drawer that will navigate to different pages.
Log In To the Flutter Application
After the user signs out of the application, then we need to create another form for log in. Inside the log in form, we will have only the email field, the password field and a elevated button. Inside the elevated button and after validation we call the method loginToFb():
void logInToFb() {
firebaseAuth
    .signInWithEmailAndPassword(
        email: emailController.text, password: passwordController.text)
    .then((result) {
    Navigator.pushReplacement(
    context,
    MaterialPageRoute(builder: (context) => Home(uid: result.user.uid)),
    );
}).catchError((err) {
    print(err.message);
    showDialog(
        context: context,
        builder: (BuildContext context) {
        return AlertDialog(
            title: Text("Error"),
            content: Text(err.message),
            actions: [
            TextButton(
                child: Text("Ok"),
                onPressed: () {
                Navigator.of(context).pop();
                },
            )
            ],
        );
        });
});
}
So here we use the method signInWithEmailAndPassword to sign in the user and we also pass both the email and the password as parameter. After this asynchronous method is finished we navigate to the home page, if this method throws any error then it will be catched by the catchError and shown on the screen by the alertdialog.
You can find the source code here: Firebase Auth Tutorial
I hope you enjoyed this Flutter/Firebase article, in the next article I will use firestore to store data.