How to Model your Firebase Data Class In Flutter

Software Developer | Technical Writer | Actively helping users with their questions on Stack Overflow.
In this article, we will use Cloud Firestore in a Flutter application, in which we will create a simple application to show how to model our data class so we can send, retrieve, delete and update data.
Get Started With Cloud Firestore
This is the eleventh article related to Firebase in Flutter, you can check the previous articles in the below links:
- Get Started With Firebase in Flutter
- Using Firebase Queries In Flutter
- Using Firebase Auth In Flutter
- Using Firebase Storage In Flutter
- Using Cloud Firestore In Flutter
- Using Firebase Cloud Messaging In Flutter
- Using Google Sign-in With Firebase In Flutter
- Using Twitter Authentication With Firebase In Flutter
- Using Facebook Authentication With Firebase In Flutter
- Using Phone Authentication With Firebase In Flutter
To know how to configure Firebase with Flutter, you can check the first article in the above list. In the other two articles, I created a form using Flutter performed queries for the realtime database and authenticated users with Firebase, in the cloud firestore article, it was different code snippet related to Firestore and explaining each one. In the last four articles I demonstrated how to use twitter_login, google_sign_in, flutter_facebook_auth, and phone authentication.
The aim of this article is to show how to seperate the UI from the data class using Cloud Firestore.
Adding Cloud Firestore To Flutter
As I said before, to check how to create a flutter project and integrate Firebase with Flutter, then please check this article Get Started With Firebase in Flutter.
Next, you need to add the following dependency to the pubspec.yaml file:
dependencies:
  cloud_firestore: ^5.2.1
  cupertino_icons: ^1.0.8
  firebase_core: ^3.3.0
  flutter:
    sdk: flutter

dev_dependencies:
  flutter_lints: ^4.0.0
  flutter_test:
    sdk: flutter
Click CTRL + S to save, and you have successfully added the above dependencies to your Flutter application!
Creating a Form
So after adding the firebase_core and the cloud_firestore dependency to the project. After creating a project in the firebase console as explained before and enabling the test mode in the cloud_firestore database we can now start in this Flutter application.
This will be a basic application, having a form in which you can add employee information and then in the dashboard screen you can see a list of employees, you can slide to delete, and pull down to refresh using the refreshindicator widget.
So, first in the main.dart add the following:
void main() async {
  WidgetsFlutterBinding.ensureInitialized();
  await Firebase.initializeApp(options: DefaultFirebaseOptions.currentPlatform);
  runApp(const MyApp());
}

class MyApp extends StatelessWidget {
  const MyApp({Key? key}) : super(key: key);

  @override
  Widget build(BuildContext context) {
    return MaterialApp(
      debugShowCheckedModeBanner: false,
      title: 'Firestore Modeling',
      theme: ThemeData.dark(),
      initialRoute: '/',
      routes: {
        '/': (context) => const DashboardScreen(title: 'Dashboard'),
        '/add': (context) => const EmployeeScreen(),
        '/edit' : (context) => const EditEmployeeScreen()
      },
    );
  }
}
As usual in the main method we need to initialize Firebase to be able to use it later on. Then we use the routes property to create three named routes.
Now first in the EmployeeScreen widget we need to do the following:
class EmployeeScreen extends StatefulWidget {
  const EmployeeScreen({Key? key}) : super(key: key);

  @override
  State<EmployeeScreen> createState() => _EmployeeScreenState();
}

class _EmployeeScreenState extends State<EmployeeScreen> {
  TextEditingController nameController = TextEditingController();
  TextEditingController ageController = TextEditingController();
  TextEditingController salaryController = TextEditingController();
  TextEditingController addressController = TextEditingController();
  TextEditingController traitsController = TextEditingController();

  final _formKey = GlobalKey<FormState>();

  bool isLoading = false;
The EmployeeScreen widget extends the StatefulWidget and then inside the _EmployeeScreenState, we create a TextEditingController for each field. Then inside the build() method we need to declare the Form widget to be able to use TextFormField that will let us validate our fields:
@override
Widget build(BuildContext context) {
return Scaffold(
appBar: AppBar(
elevation: 0,
title: const Text("Add Employee"),
),
body: SingleChildScrollView(
child: Form(
    key: _formKey,
    child: Padding(
    padding: const EdgeInsets.all(16.0),
    child: Column(
        crossAxisAlignment: CrossAxisAlignment.start,
        children: [
        const Text('Name', style: textStyle),
        const SizedBox(height: 8.0),
        TextFormField(
            controller: nameController,
            keyboardType: TextInputType.text,
            decoration:
                inputDecoration.copyWith(hintText: "Enter your Name"),
            validator: (value) {
            if (value == null || value.isEmpty) {
                return 'Please enter Name';
            }
            return null;
            },
        ),
So, as you can see here above the TextFormField we use a Text widget to give a name for each field. In the TextFormField we specify the keyboardType and the controller. We also create both the textStyle and the inputDecoration as global variables, doing that will enable us to use these styles everywhere and just update the properties by using the method copywith():
const textStyle = TextStyle(
  color: Colors.white,
  fontSize: 22.0,
  letterSpacing: 1,
  fontWeight: FontWeight.bold,
);

final inputDecoration = InputDecoration(
border: OutlineInputBorder(
borderRadius: BorderRadius.circular(8.0),
borderSide: const BorderSide(
    color: Colors.redAccent,
    width: 2,
)));
We continue adding the other fields in the same pattern as the above code and then finally in the end we create an ElevatedButton for the submitting the data:
!isLoading
    ? Center(
        child: ElevatedButton(
            style: ButtonStyle(
                minimumSize:WidgetStateProperty.all(const Size(200,50)),
                backgroundColor: WidgetStateProperty.all<
                        Color>(
                    const Color.fromARGB(255, 83, 80, 80))),
            onPressed: (() async {
                if (_formKey.currentState!.validate()) {
                DatabaseService service = DatabaseService();
                List<String> employeeTraits = traitsController.text.split(",");
                late Address address;
                if (addressController.text.contains(",")) {
                    List<String> fullAddress =
                        addressController.text.split(",");
                    address = Address(
                        streetName: fullAddress[0],
                        buildingName:
                            fullAddress[1],
                        cityName: fullAddress[2]);
                }
                Employee employee = Employee(
                    name: nameController.text,
                    age: int.parse(ageController.text),
                    salary:
                        int.parse(salaryController.text),
                    address: address,
                    employeeTraits: employeeTraits);
                setState(() {
                    isLoading = true;
                });
                await service.addEmployee(employee);
                setState(() {
                    isLoading = false;
                });
                }
            }),
            child: const Text("Submit",style: TextStyle(fontSize: 20),)),
        )
    : const Center(
        child: CircularProgressIndicator(),
        )
So, here basically we use if (_formKey.currentState!.validate()) to check if all the fields pass the validation. Then we create an instance of the DatabaseService which is a custom class and it will act as a data access object. Then we create an instance of the two classes Address and Employee and then call addEmployee() to save the data in Cloud Firestore.
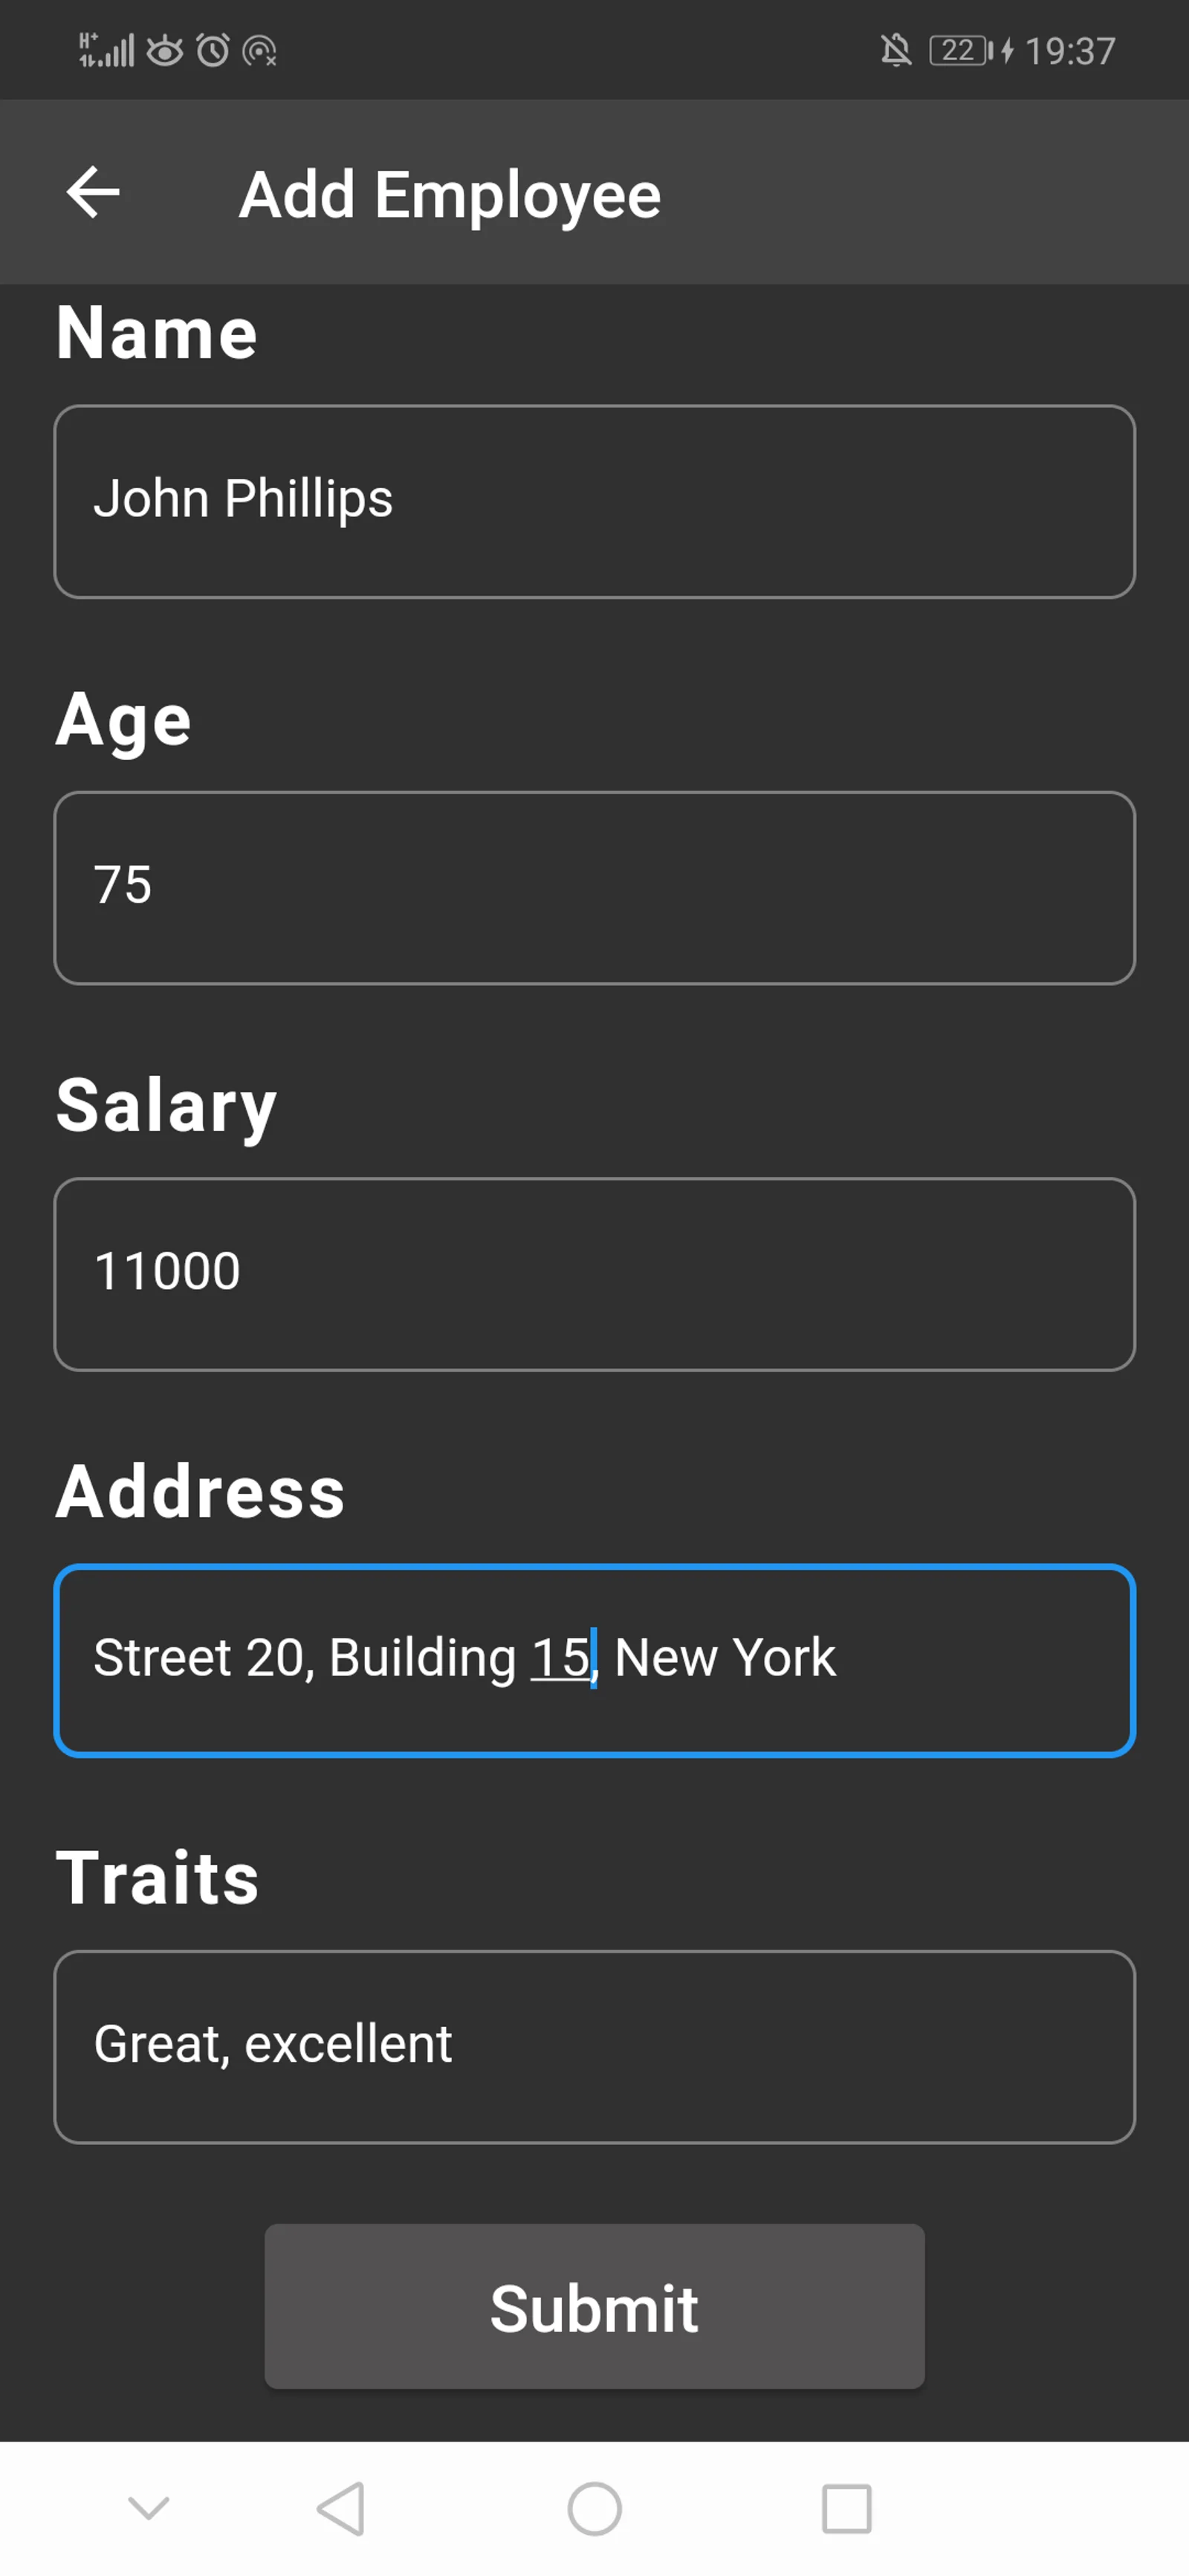
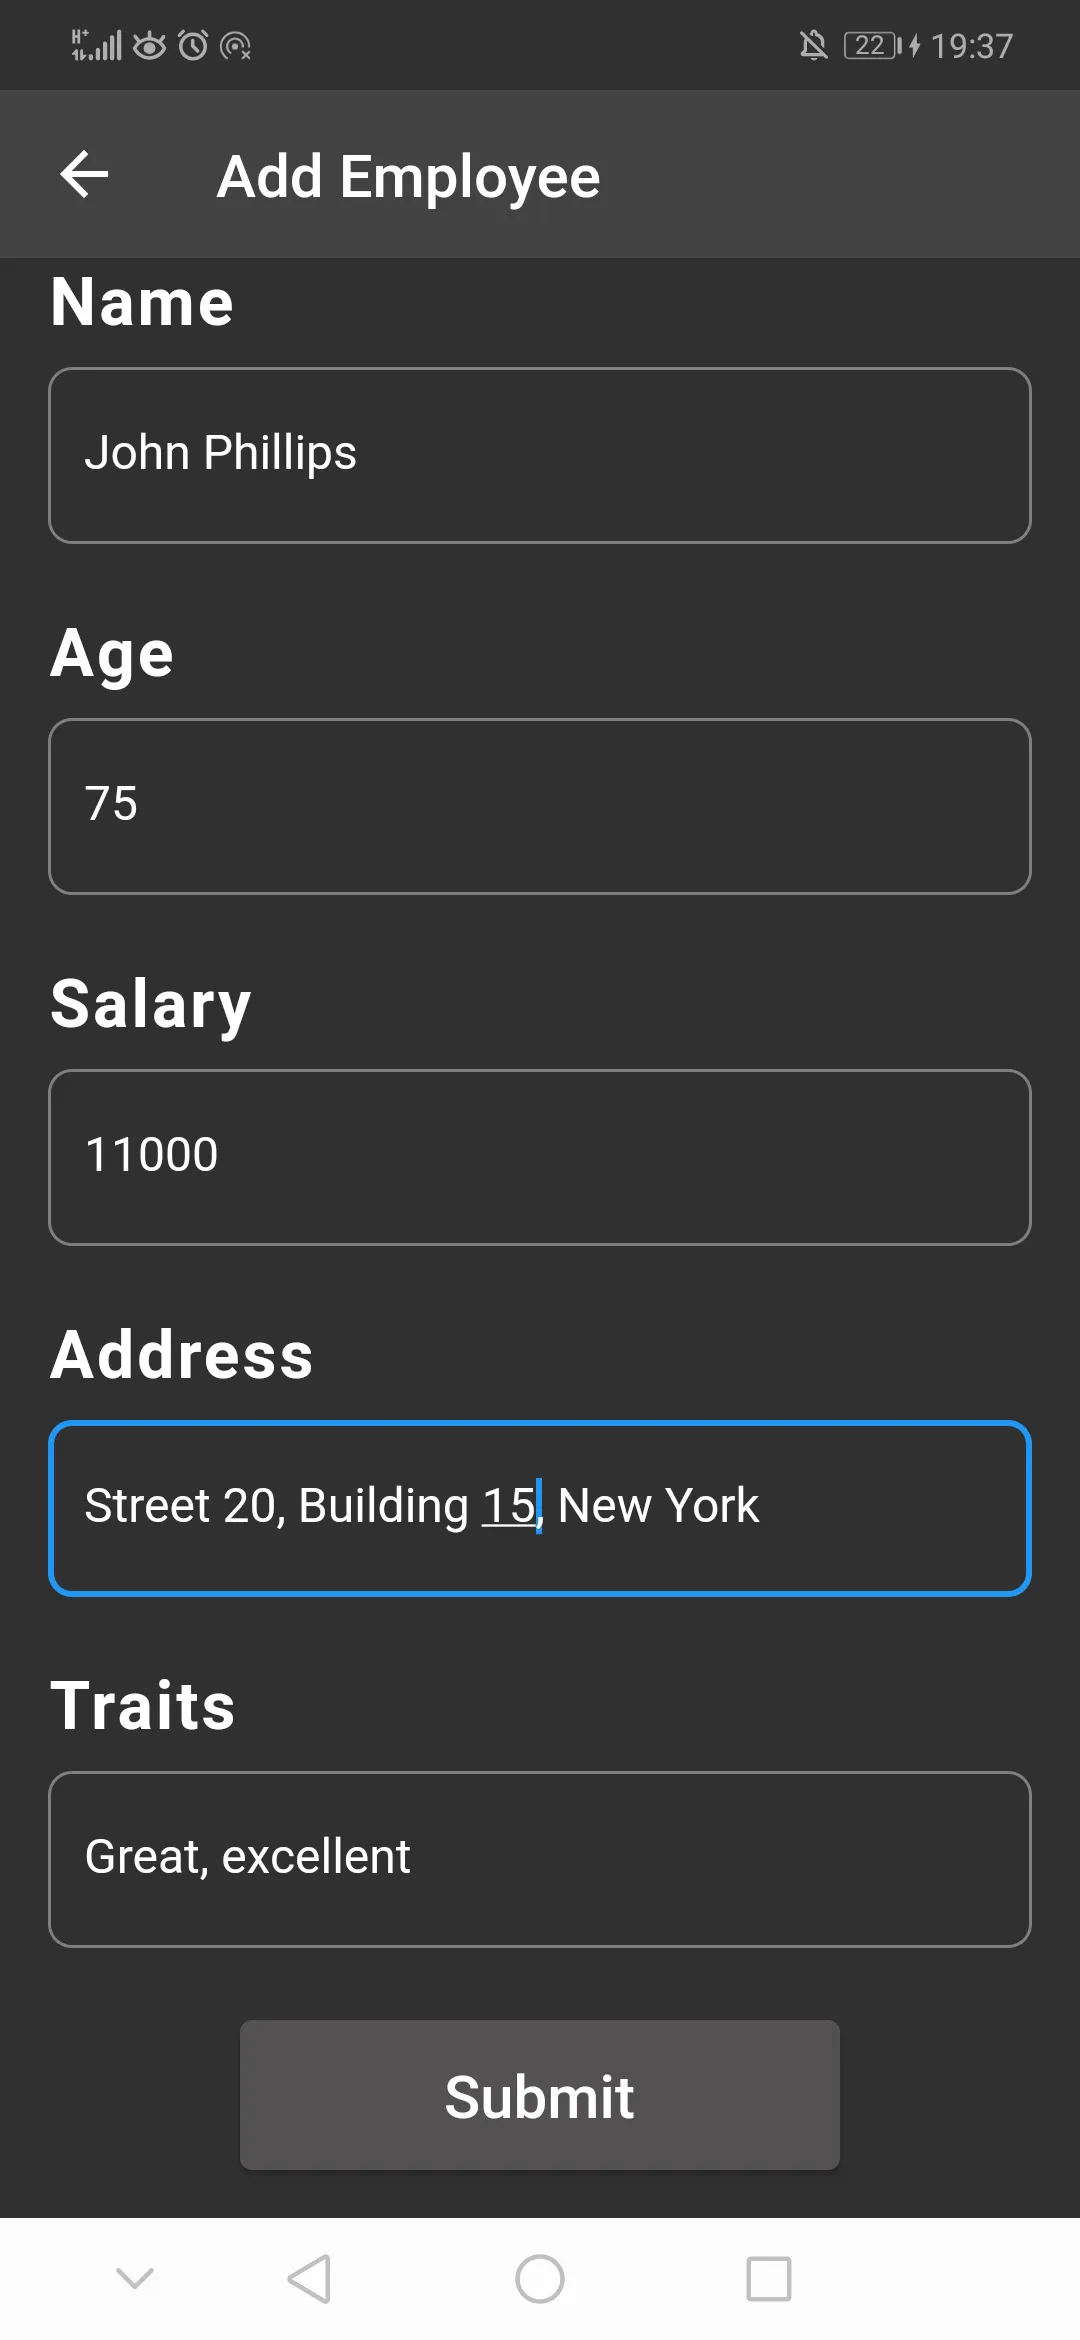
We would have the following screen:
Creating the Data Model
Since the goal is to seperate the UI from the logic, then we need to create the data model that would be used to add data to the Cloud Firestore. This way we achieve seperation of concern, and if a new team member gets added then they can easily know which class to use and which attributes to use. So, first create an Address class:
class Address {
final String streetName;
final String buildingName;
final String cityName;
Address(
{required this.streetName,
required this.buildingName,
required this.cityName});
Map<String, dynamic> toMap() {
return {
'streetName': streetName,
'buildingName': buildingName,
'cityName': cityName,
};
}
Address.fromMap(Map<String, dynamic> addressMap)
: streetName = addressMap["streetName"],
buildingName = addressMap["buildingName"],
cityName = addressMap["cityName"];
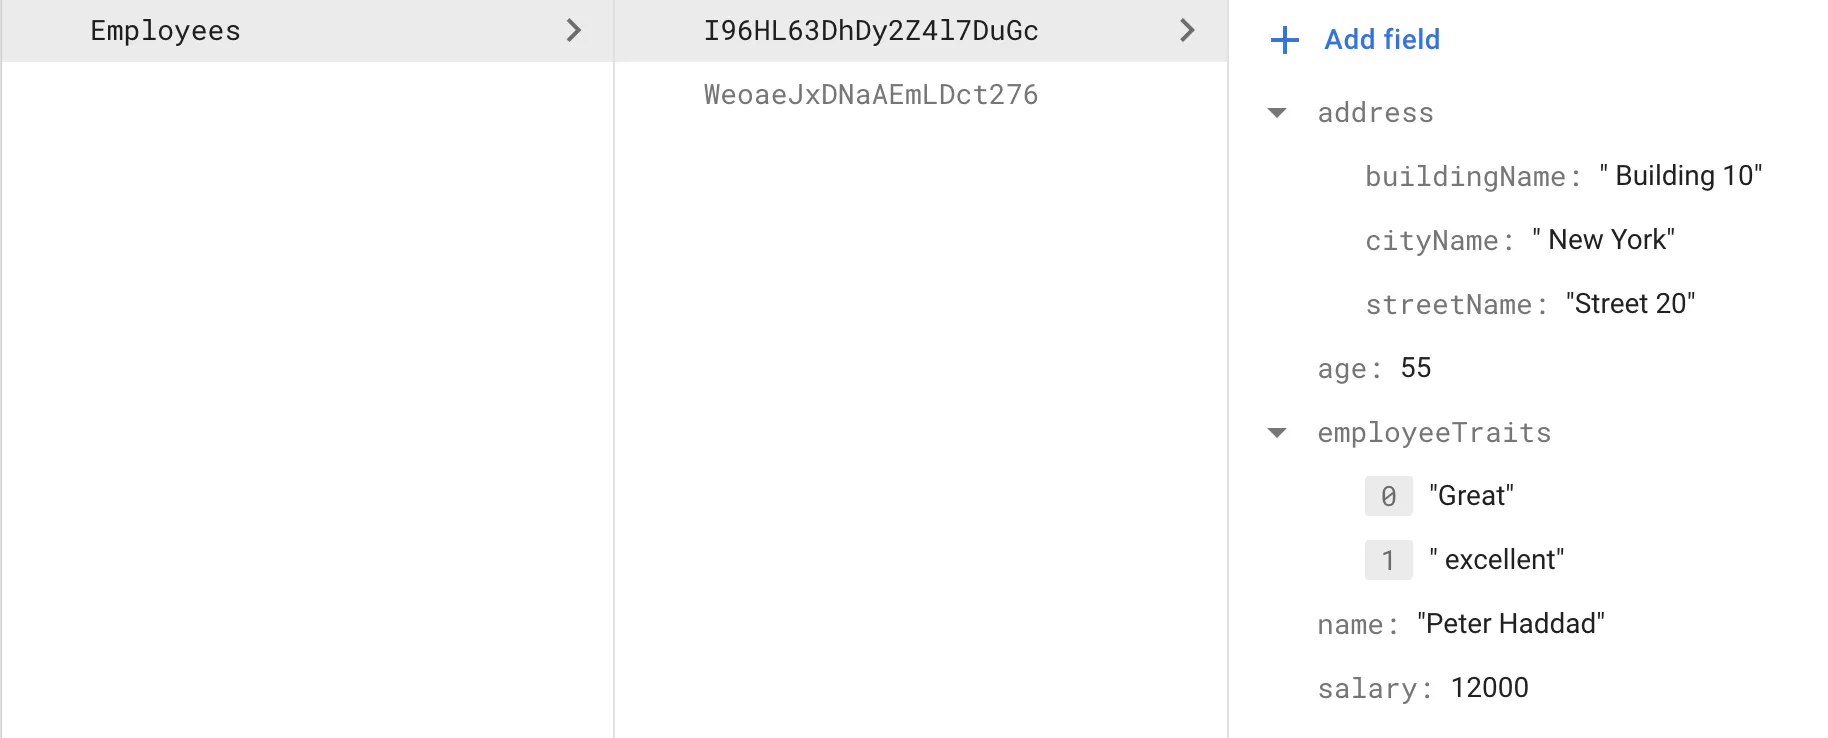
}The Address class will be an instance variable in the Employee class thus achieving composition. So, since the Address class will be inside the Employee class, therefore it will get added as a map inside Cloud Firestore.
Therefore we create a method called toMap() to return a map of values and we create a named constructor fromMap where we initialize all the variables with the values that we will get from the database. Now we can create the Employee class:
class Employee {
  final String? id;
  final String name;
  final int age;
  final int salary;
  final Address address;
  final List<String>? employeeTraits;
  Employee(
      {this.id,
      required this.name,
      required this.age,
      required this.salary,
      required this.address,
      this.employeeTraits});

  Map<String, dynamic> toMap() {
    return {
      'name': name,
      'age': age,
      'salary': salary,
      'address': address.toMap(),
      'employeeTraits': employeeTraits
    };
  }

  Employee.fromDocumentSnapshot(DocumentSnapshot<Map<String, dynamic>> doc)
      : id = doc.id,
        name = doc.data()!["name"],
        age = doc.data()!["age"],
        salary = doc.data()!["salary"],
        address = Address.fromMap(doc.data()!["address"]),
        employeeTraits = doc.data()?["employeeTraits"] == null
            ? null
            : doc.data()?["employeeTraits"].cast<String>();
}
In the above class, we have the Address class inside the Employee class and we create a method called toMap() that will be used when adding data to Cloud Firestore. Then in the named constructor Employee.fromDocumentSnapshot we will pass an argument of type DocumentSnapshot which will contain data read from the document. Also, as you can see we use the Address.fromMap(), so we can transform the address map into an address object.
Creating the Data Access Object
Now, create a file called database_service.dart with class name DatabaseService. This class will be the layer that will communicate directly with Cloud Firestore. So, first we need to create an instance:
final FirebaseFirestore _db = FirebaseFirestore.instance;and then we can do the following:
  addEmployee(Employee employeeData) async {
    await _db.collection("Employees").add(employeeData.toMap());
  }

    updateEmployee(Employee employeeData) async {
    await _db.collection("Employees").doc(employeeData.id).update(employeeData.toMap());
  }

  Future<void> deleteEmployee(String documentId) async {
    await _db.collection("Employees").doc(documentId).delete();

  }

  Future<List<Employee>> retrieveEmployees() async {
    QuerySnapshot<Map<String, dynamic>> snapshot =
        await _db.collection("Employees").get();
    return snapshot.docs
        .map((docSnapshot) => Employee.fromDocumentSnapshot(docSnapshot))
        .toList();
  }
As you can see here, we use the Employee object to retrieve,add, and update the data. Both the add() and the update() method take a value of type Map<String,dynamic> as arguments thus we use the toMap() method.
In the retrieveEmployees() method we use the docs property which is of type ist<QueryDocumentSnapshot<Map<String, dynamic>>> thus we can use the map() method which will create a new Iterable. In our case we map the retrieved data to the Employee class and then call the toList() to get a List<Employee>.
Retrieving the Data
Now to retrieve the data, we need to navigate to the main.dart and add the DashboardScreen class, which will extend a StatefulWidget:
class DashboardScreen extends StatefulWidget {
  const DashboardScreen({Key? key, required this.title}) : super(key: key);

  final String title;

  @override
  State<DashboardScreen> createState() => _DashboardScreenState();
}
}

class _DashboardScreenState extends State<DashboardScreen> {
  DatabaseService service = DatabaseService();
  Future<List<Employee>>? employeeList;
  List<Employee>? retrievedEmployeeList;
Now in the initState() we call the _initRetrieval() method that will assign the future to be used in the FutureBuilder:
  @override
  void initState() {
    super.initState();
    _initRetrieval();
  }

    Future<void> _initRetrieval() async {
      employeeList = service.retrieveEmployees();
      retrievedEmployeeList = await service.retrieveEmployees();
  }
Inside the build() method we do the following:
body: RefreshIndicator(
onRefresh: _refresh,
child: Padding(
padding: const EdgeInsets.all(16.0),
child: FutureBuilder(
future: employeeList,
builder:
(BuildContext context, AsyncSnapshot<List<Employee>> snapshot) {
if (snapshot.hasData && snapshot.data!.isNotEmpty) {
return ListView.separated(
itemCount: retrievedEmployeeList!.length,
separatorBuilder: (context, index) => const SizedBox(
height: 10,
),
itemBuilder: (context, index) {
return Dismissible(
onDismissed: ((direction) async{
await service.deleteEmployee(
retrievedEmployeeList![index].id.toString());
_dismiss();
}),
background: Container(
decoration: BoxDecoration(
color: Colors.red,
borderRadius: BorderRadius.circular(16.0)),
padding: const EdgeInsets.only(right: 28.0),
alignment: AlignmentDirectional.centerEnd,
child: const Text(
"DELETE",
style: TextStyle(color: Colors.white),
),
),
direction: DismissDirection.endToStart,
resizeDuration: const Duration(milliseconds: 200),
key: UniqueKey(),
child: Container(
decoration: BoxDecoration(
color: const Color.fromARGB(255, 83, 80, 80),
borderRadius: BorderRadius.circular(16.0)),
child: ListTile(
onTap:() {
Navigator.pushNamed(context, "/edit", arguments: retrievedEmployeeList![index]);
},
shape: RoundedRectangleBorder(
borderRadius: BorderRadius.circular(8.0),
),
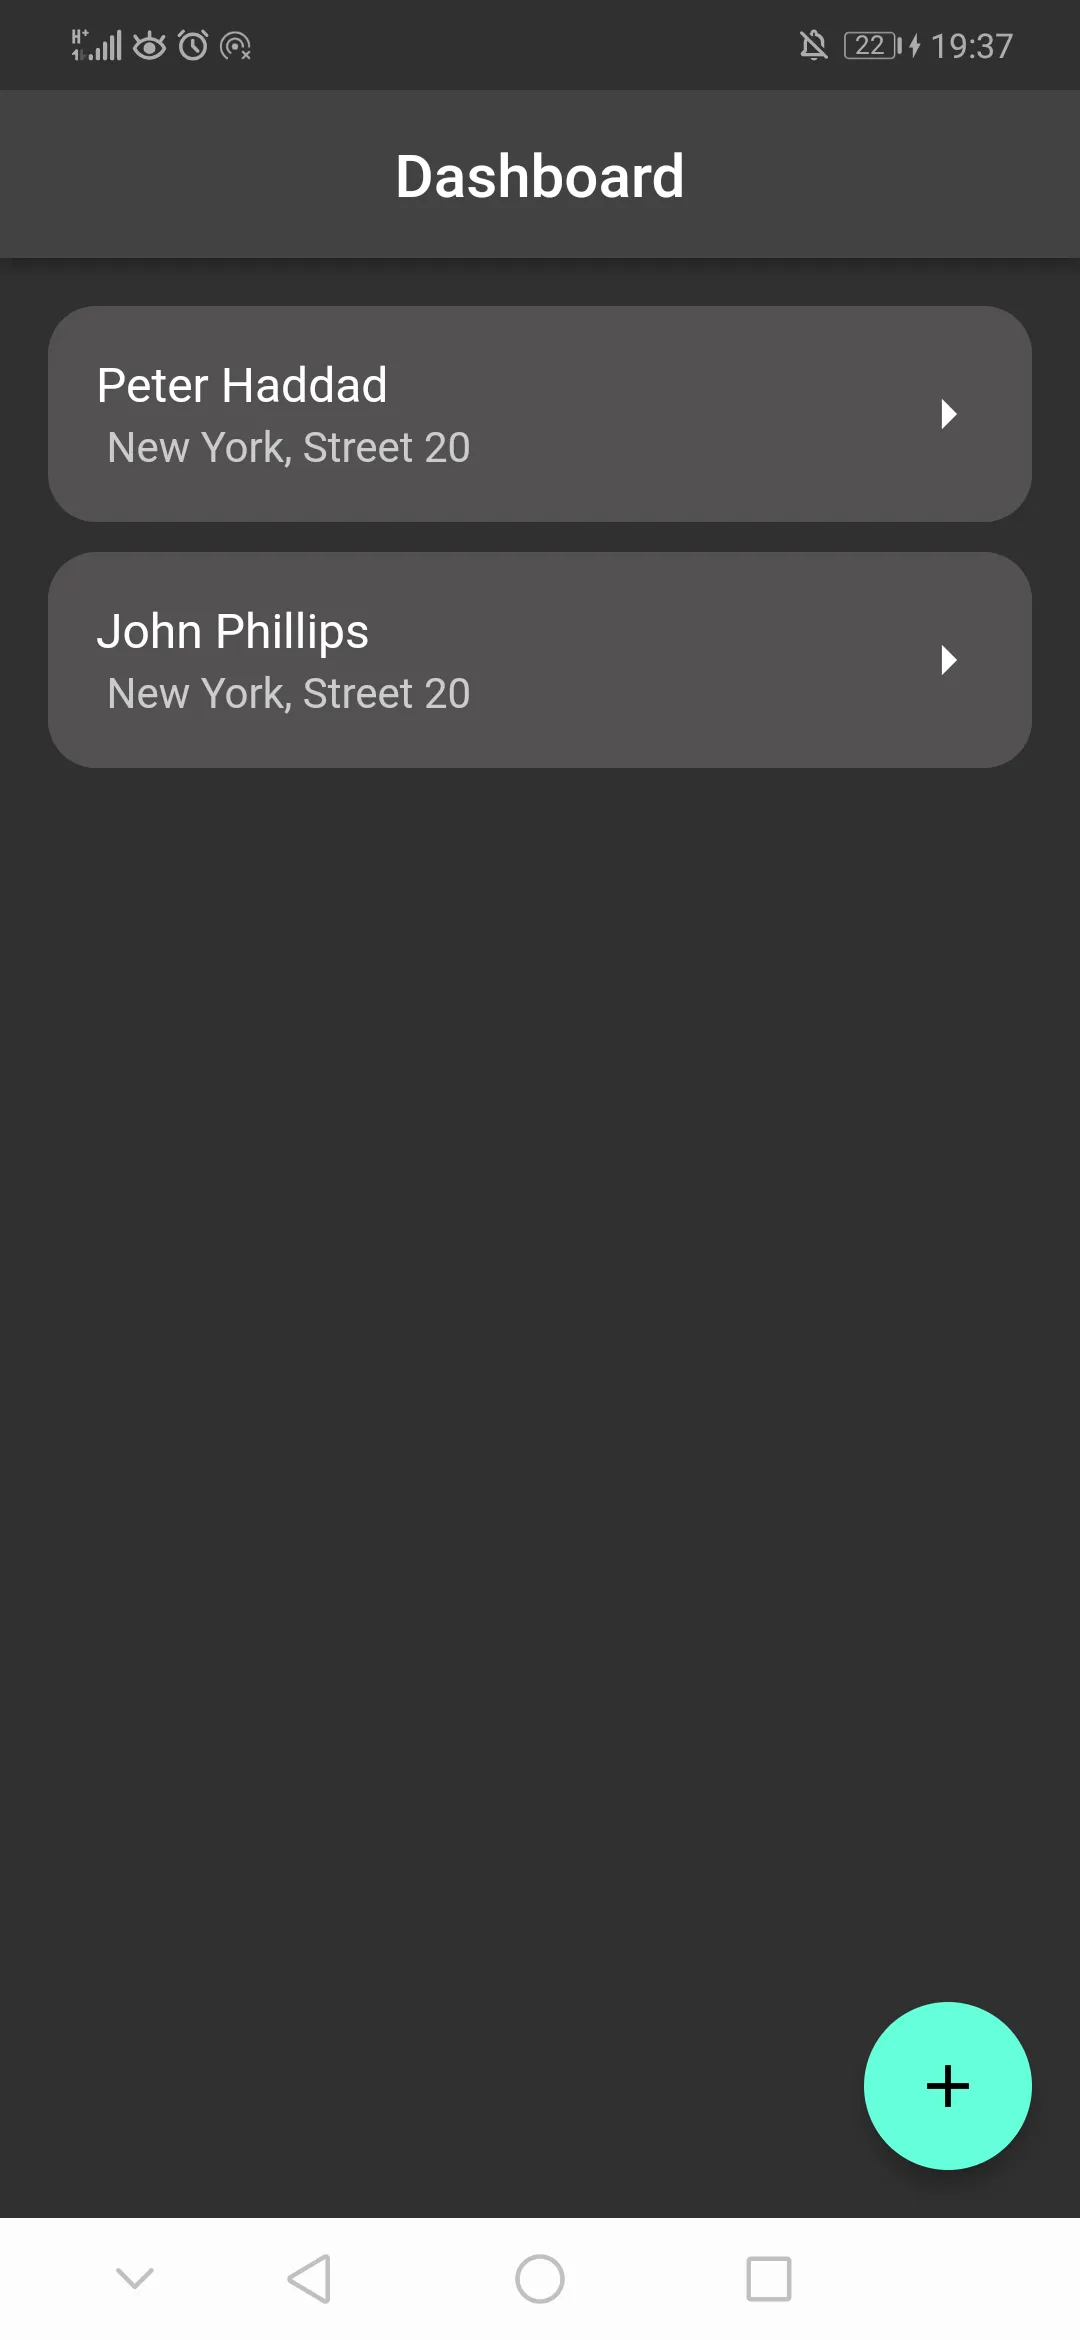
title: Text(retrievedEmployeeList![index].name),
subtitle: Text(
"${retrievedEmployeeList![index].address.cityName.toString()}, ${retrievedEmployeeList![index].address.streetName.toString()}"),
trailing: const Icon(Icons.arrow_right_sharp),
),
),
);
});
} else if (snapshot.connectionState == ConnectionState.done &&
retrievedEmployeeList!.isEmpty) {
return Center(
child: ListView(
children: const <Widget>[
Align(alignment: AlignmentDirectional.center,
child: Text('No data available')),
],
),
);
} else {
return const Center(child: CircularProgressIndicator());
}
},
),
),
),
floatingActionButton: FloatingActionButton(
onPressed: (() {
Navigator.pushNamed(context, '/add');
}),
tooltip: 'add',
child: const Icon(Icons.add),
),We first use the RefreshIndicator to implement the pull to refresh functionality. Then using the FutureBuilder we fetch the data and using the ListView.seperated widget we can show the data on the screen. We also use the Dismissible to implement the swipe to delete which will delete it from the list and from Cloud Firestore.
References
I hope you enjoyed reading this flutter/firebase tutorial, please feel free to leave any comments or feedback on this post!